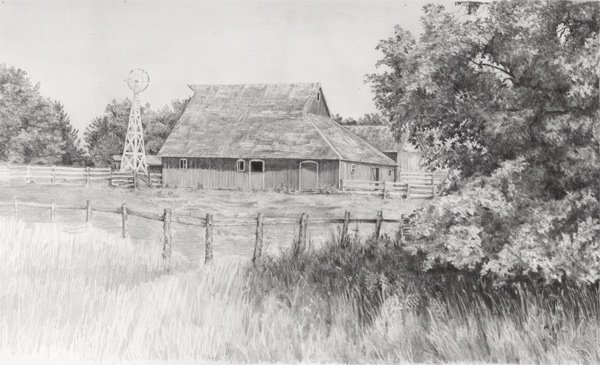
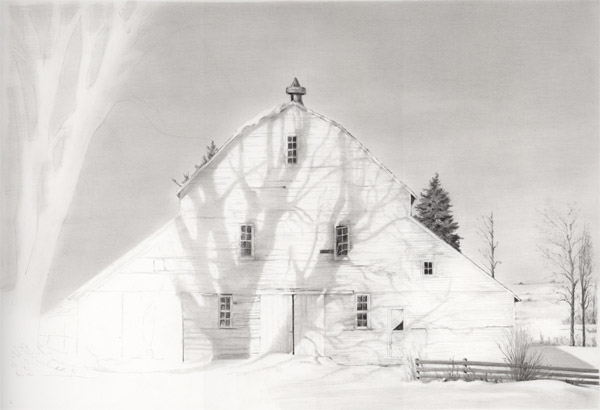
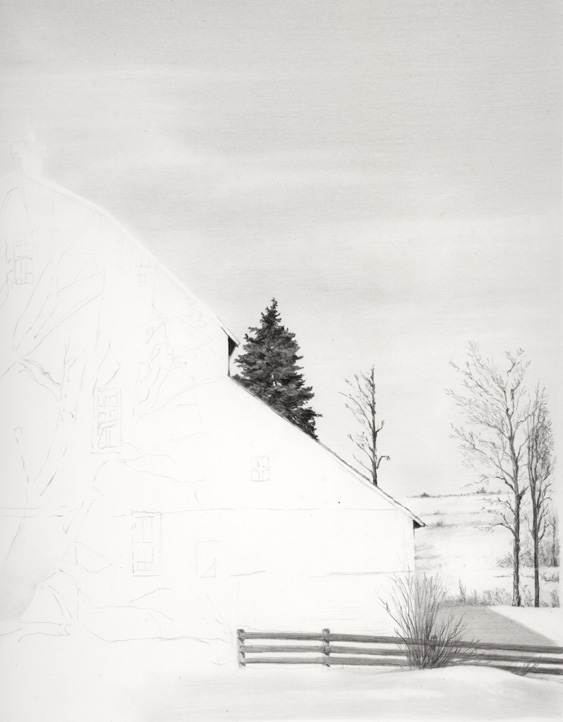
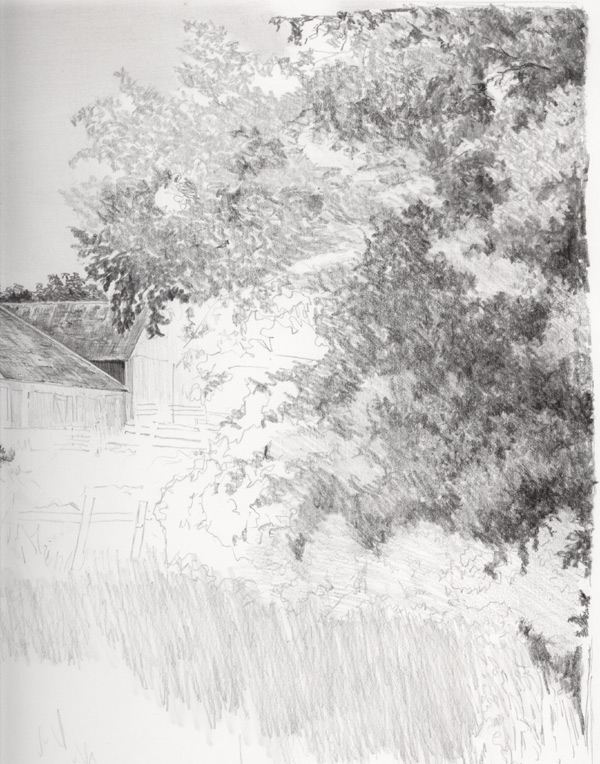
 I've been working this morning on finishing this piece. As always it will sit for a week and see if anything else demands more or changes needed.
The weeds in the front were a real dilema. I didn't want a 'front wall' of weeds and the fence was also a dominant horizontal block in this composition. I spent this week contemplating just how I was going to tackle the weeds but also trying to figure out how I should handle these two dominant elements. I decided to pull the fence line slightly down with a slight bow to it. This broke up the horizontal block and I also added a bit more 'character' to the poles than what is in the reference photo. Last night, I figured out a solution to the wall of weeds. I made a slight valley where the fence bowed. This did two things...it broke up that imposing wall but it also gave the viewer a 'way into' the scene.
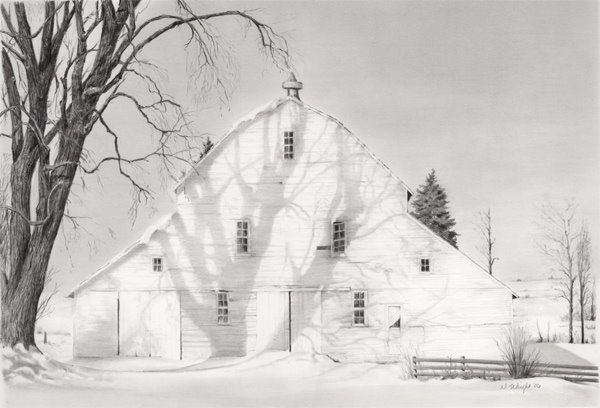
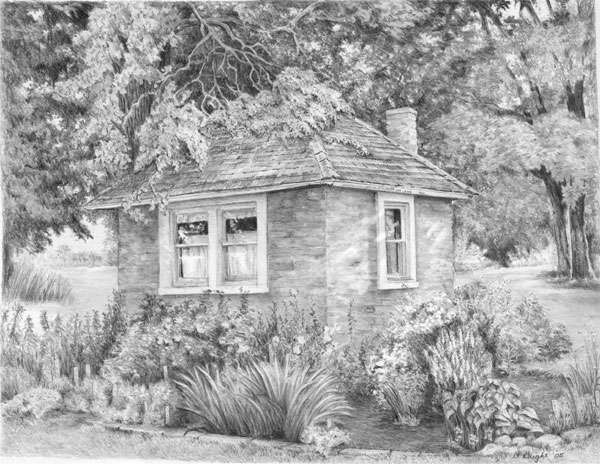
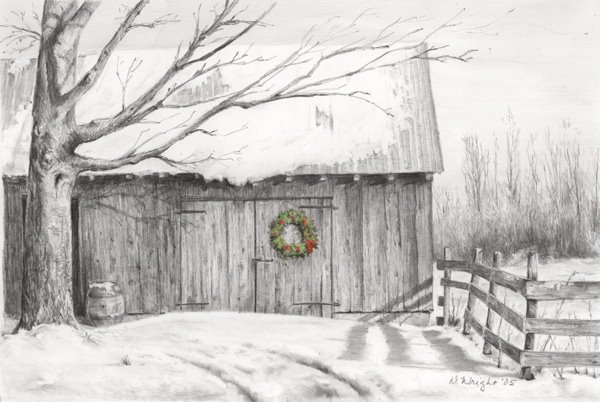
I hope you've enjoyed this journey with me! What had appeared to become a very plain barn drawing became a very pleasing 'painting' albeit in b&w.
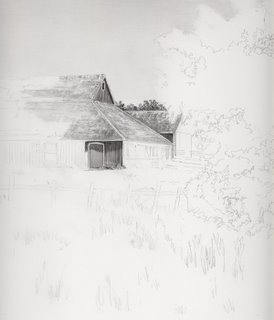
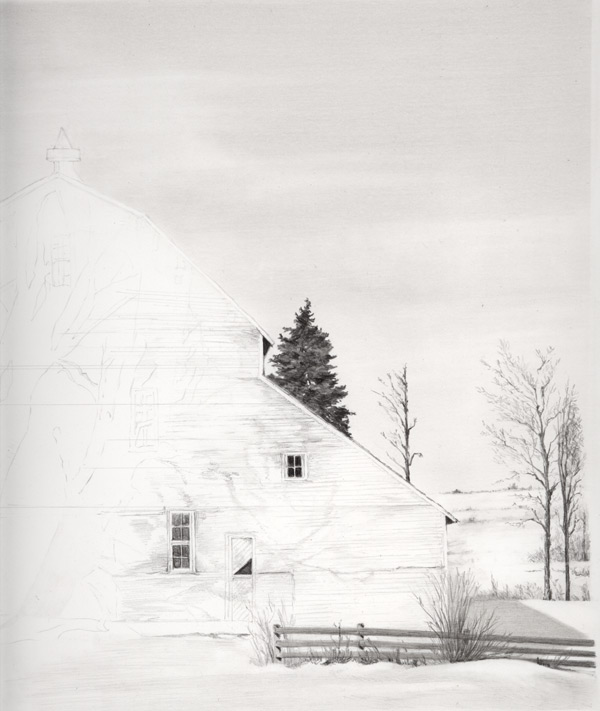
 I'm slowly progressing through this landscape.... I've got the lower left corner yet to do. I've been working on the fence post. It is a bit strange that the fence only has one set of boards on it. Don't know if they have a wire in the middle to prevent the horses from getting out.
I've at least got the rest of the weeds blocked in now and need to detail in the weeds in the lower left half.

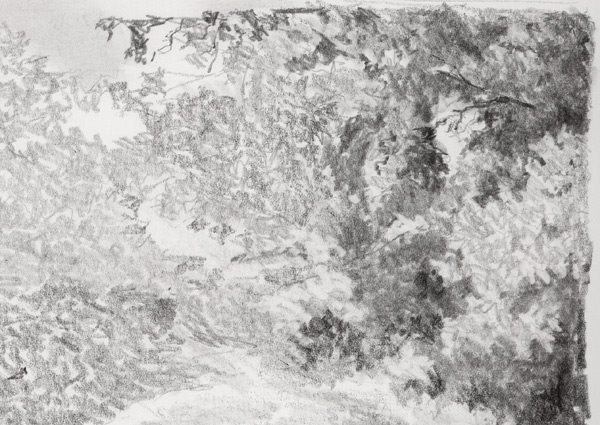
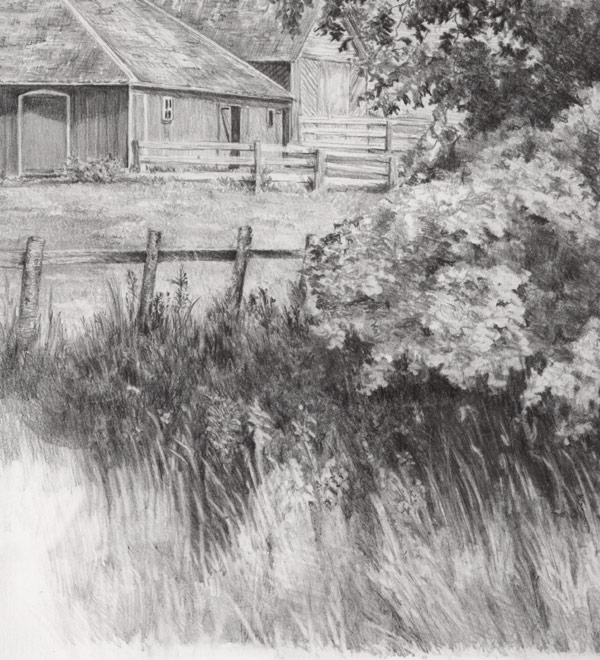 3/4/06 Well it is the weekend and I'm back at it again! Weeds are always a challenge and these have proved to be no exception!! I wish they would just get easier to draw. But I think I've got the shadowed area under the tree and the weeds surround the tree finally wrestled down on the paper. Here is a close-up of the weeds.....I've been using a 2H clutch pencil over B .5 mech pencil in this section. Using lots of blu-tak and electric eraser building and removing layers of grass.
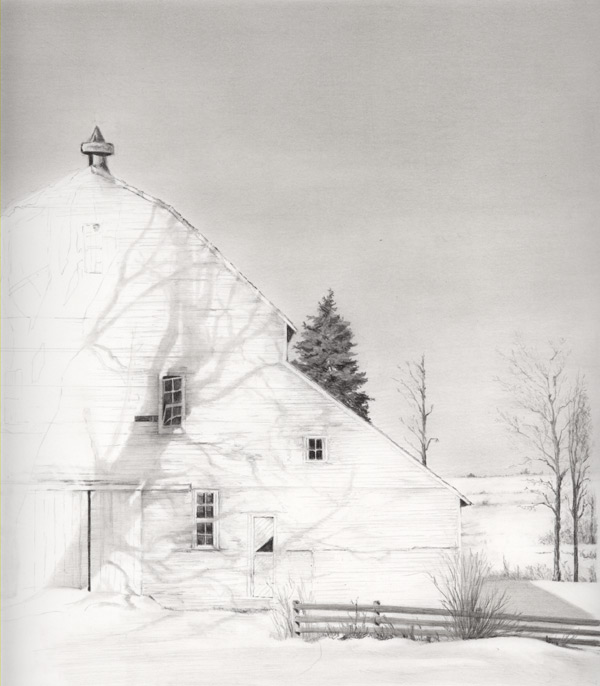
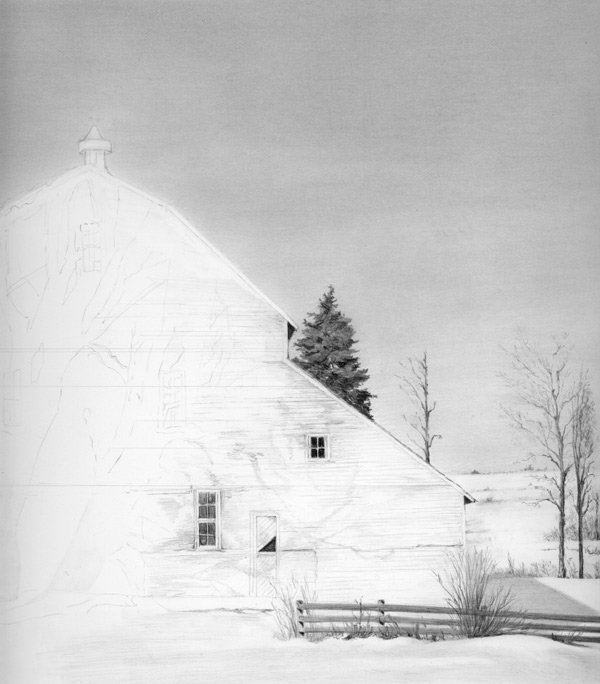
 Here is another small update. I finished the barn on the sunny side and have started laying in the grass around the barn.
Thought I would scan all the sections and merge so you can see the whole drawing instead of just the sections.
 Here is one more update for the evening. I continued to work the 2B in the shadows and 3H in the lighter areas creating impressions of leaves. I have now completed the tree and will start working on the weeds and shadows surrounding the tree.....
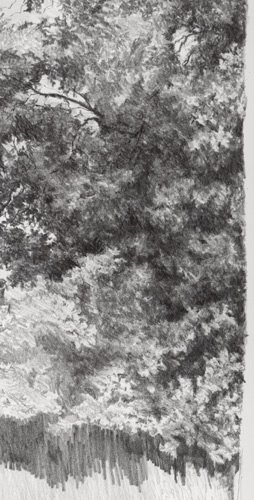 I have been requested to provide even more descriptive detail....I will try and comply. Sometimes it is difficult to stop and scan when I'm drawing!
Here is a minor update, but I wanted to show the next step as I'm moving along. I am using a 2B and 3H .5 mechanical pencil and working in some detail. I am using the 2B in the shadows to deepen areas and I am using the 3H in the highlight areas to develop those lighter shades of gray. I am using Blu-tack and pulling in some of those medium shades of gray.
Things to observe as you are drawing trees. If you look at the small openings in the tree where the sky is seen, the tree branches are very detailed and very dark in shadow. These areas are important to capture as they are critical 'clues' that tell the viewer that this is a tree. I do not ever draw a single leaf....rather I give impressions of leaves by the shapes and highlights that I use.
Another thing to observe is the greatest contrasts are seen where the highlighted leaves are right next to the darkest shadows. These are important points to give the tree contrast and depth.
Always know where your light source is coming from. Consistent application of the shadows will make the tree more 'believable'. Hope these are helpful tidbits.....
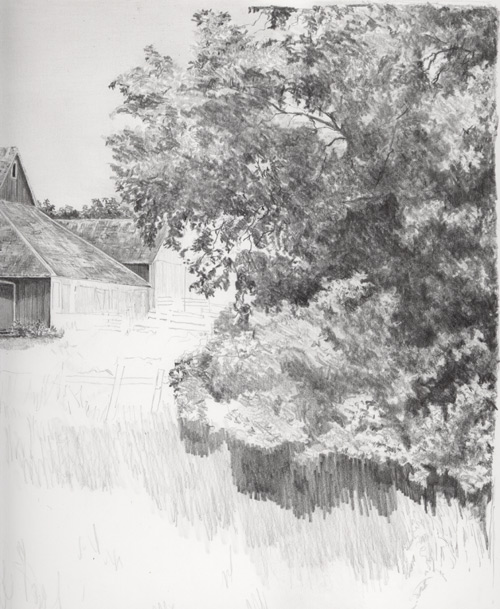 Continuing to work on the tree.... Getting closer to have the darkest areas mapped out. I'm working hard to keep a consistent texture as I work in the dark areas. My impatience wants me to just block in the shadows but that doesn't work to develop those richer shaded areas.
I have been doing most of this work with an HB clutch pencil. However, I'm finding I am wearing down my chisel end quickly and having to resharpen frequently. It has worked well to build up the textured areas but I think I'm going to switch back to my .5 mechanical pencil to start working in the details. I'll be lightening some the darker areas up with blu-tack as I get into the nitty gritty of the leaves. (I hope....that's my game plan anyway!!!)
 This is a small update, I am slowly building up the tree branches, working dark to light. I concentrate on the shadowed areas (negative space) as I am drawing.
I started working on the tree in the foreground. I thought I would post an prelim
 inary layering of the tree branches so you might see how this foliage transforms itself.
I start with laying down a textured pencil stroke and block in the shaded areas. It's pretty rough right now, but thought you all might like to see the very ugly stage! I will continue to build up and erase areas to create impressions of leaves. I wish I had a firm process down to do this...but I always seem to stumble my way through it... this is the upper right corner of the foreground tree.
 Finishing up on the trees in the background. I like these clutch pencils. I feel like I'm painting in B&W! I actually was standing up at my draft table while drawing the tree on the left....
 Here's the 2nd installment and have been working on the shingles and side of the barn.
I 've been using clutch pencils trying to get use to them. I am liking them more and more as I draw. Ken Brown on DrawingLinetoLife group mentioned that the "pencil lead lays down smooth and creamy". This is a perfect description of the lead. I really didn't think the lead quality would make that much difference. I was definitely wrong!
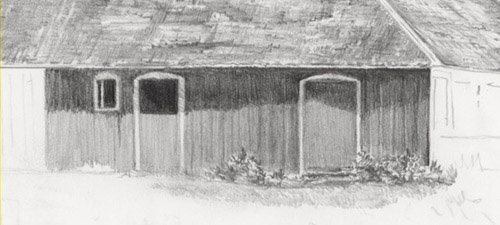
The siding of the barn is laid down with one pencil stroke. I've made a chisel end to it lead and with one stroke I have a perfect shade. I am using HB for the siding.
The highlights on the shingles are done by touching my electric eraser to the paper. I recently picked up a tip from Lucy Conway to sharpen the tip of my eraser using sandpaper. This works perfectly!!!
The tips and suggestions provided by other artists makes drawing so much more enjoyable. I appreciate all the assistance from both yahoogroups...DrawingLinetoLife and DrawingTogether2!
I have laid in the sky and have started working on the shingles and sides of the barn.
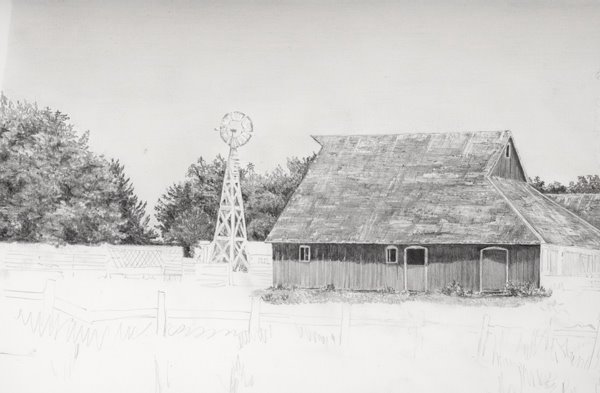
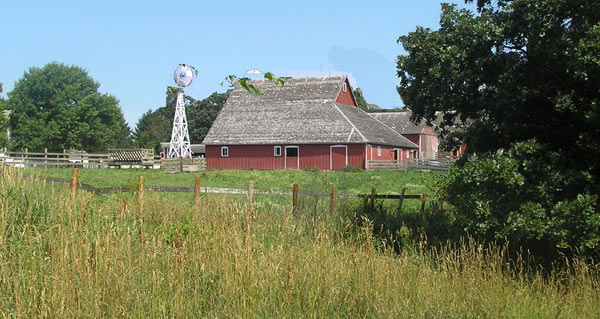
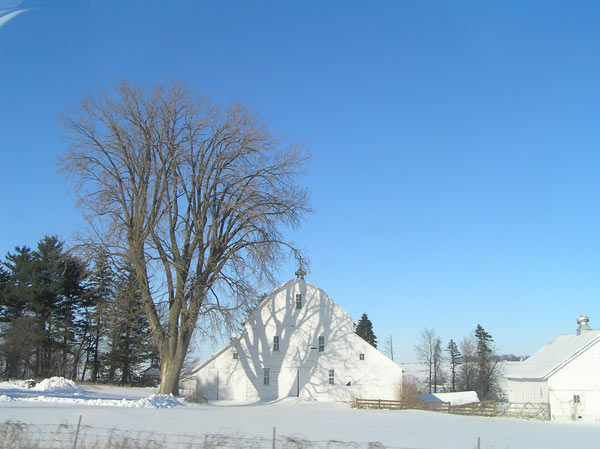
Continuing with the Living History Farm Series, I have started a drawing of the 1900 Barn. This is a 'classic' DWright composition. I had to do some adjusting of the image by merging a couple of photos together. But you'll get a good idea of what it will look like from this reference photo.


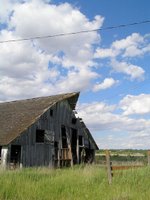 s a few people scavenging the boards off. I was having a particularly challenging day at work and was driving home in a bad mood. I looked at the clouds and thought - oh great - sure now I need to go home and get my camera and take pictures of these incredible clouds! But maybe it will put me in a better mood. I hurried home, got my camera, and went to my favorite hangout - this barn. (Which is the last old barn close by my home!) I got the best photos I have ever taken of this barn and perhaps the best photos I have ever taken. Just as soon as I finished my photo shoot and jumped back in the car, the skies let loose and it poured cats & dogs! Needless to say, work was forgotten and I was feeling great! That day, everything happened for a reason and timing was everything. I've been itching to draw this one ever since.
