Sunday, March 02, 2008

Nature's Talons

I took the plunge and punched up the values throughout the scene. I have textured the rock and made a few angles and crevices.....


I've done a lot of messing around with this one. I've pushed, shaded, highlighted, textured and basically over-worked this piece. I might try this one again, once I figure out just how to contrast the rock and tree roots textures.....


Nature's Talons


This is a drawing that I have started over at least 3 times. There are a number of challenges in this piece....I want to really capture the strength and depth of the roots as they wrap themselves around this rock. I want to contrast the textures of the rock and tree bark. I really want to create/use the lighting for more drama and finally, I want to make the background very atmospheric. With all these criteria, this one has developed the farthest. I'm not sure if it will be the final version...but it's getting closer. This is difficult as I am making subtle changes from the reference photo to my drawing image. Something I am continuing to strive for. I am free-handing the objects to allow my 'vision' of the scene be more interpreted. I am finding the lighting to be the greatest challenge. The reference photo has the sun behind the tree causing most of it in shadow. I am attempting to pull the sun to the right to create cast shadows of the roots onto the rock to create more drama and depth.

Piute Mountain Series III

Continuing on my Nature Series of the Sequoia National Forest in So. California, here is another view.

This drawing is 8.5 x11" on mellotex paper. I am still trying to get use to drawing on this smooth surface. Creating smooth skies is a breeze as well as drawing rocks and pine trees. I am challenged by the bed of pine needles that cover the ground and drawing grass. I will have to keep working on develop different techniques on this paper.

Enjoy!

Sunday, January 13, 2008

Piute Mountain Series II

Here is the completed drawing. I worked on the movement of the branches in the tree. I attempted to keep the area between the branches more open, leaving more of the sky and background visible. The area on the bottom left had me stalled for awhile. But I decided upon added a few rocks to keep the area simple allowing the focus of the drawing to be in the middle plain.

Here is the completed drawing. I worked on the movement of the branches in the tree. I attempted to keep the area between the branches more open, leaving more of the sky and background visible. The area on the bottom left had me stalled for awhile. But I decided upon added a few rocks to keep the area simple.


The tree branches are a challenge. I am trying to make sense of the tangled branches. Using caution not to be too organized but still control the flow and direction of them. The rocks behind the tree still need some work. The two dark ones next to the tree need a bit of adjustment as they ended up being the same size and look like two eggs instead of rocks.


Doing a preliminary sketch first and then sketching out the scene for the final drawing is providing me with an extra opportunity. This allows me to exaggerate limbs or slightly alter the placement of objects freely on the paper. Something I rarely do. This drawing is approximately 7 x 9" and is again on the mellotex paper.

The sky is done by laying down a light crosshatching of "F" .5 mm pencil, then chamoising smooth. The next foggy layer was done with a dirty tortillion and the distant pines are done using a 2B .5 mm pencil with short strokes and a tad of blending with a tortillion.

The rocks and tree are boldly shadowed by 4B .5 mm pencil - something I rarely use right off to bat but seems to be working well.


Continuing on with my nature studies, here is the reference photo. This is another view from the Sequoia National Forest in California. We visited our son and took a day trip through some of the most beautiful scenery I have ever seen. Below is a sketch I did to get a feel for the scene.

Thursday, January 10, 2008

Piute Mountain Series I

I have darkened the rocks on the left and lightened the black 'halo' around top rock. I have also darkened the foreground and gave more definition to the foreground rocks.
This drawing is 7" x 9-1/2".


I have adjusted some of the rock edges. Making them a bit less straight and more angular. I extended the path all the way to the top of the ridge and I 've been working on darkening the path.


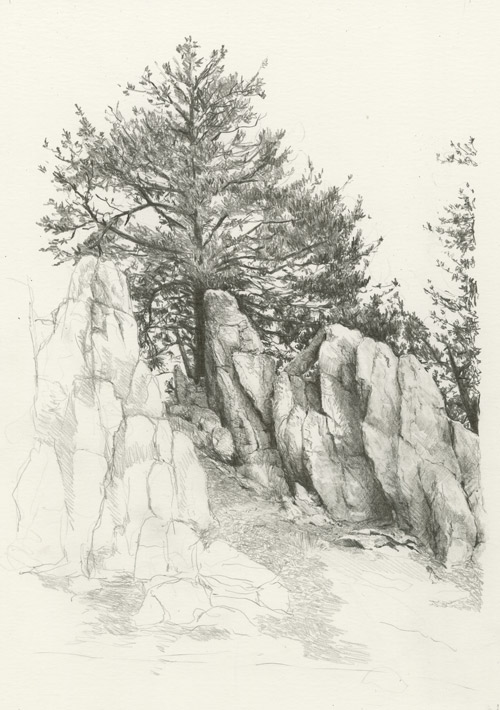
Is this a retake of a previous drawing? Well in a sense. I am trying out a new paper - Mellotex created in England. It is an ultra-smooth, ultra-white paper with a matte finish.

I think I may have overworked some areas but this is really giving me a great opportunity to play with textures. It has a wonderful flat matte feel to it that I enjoy. I can layer and layer and layer. And I can create the mid-tones easily, which is something I have always struggled with.

I still have a bit to do with this scene yet. The foreground and the path needs some work yet.

Enjoy!

Saturday, December 01, 2007

Nature Study

I think I am finished with this study.....


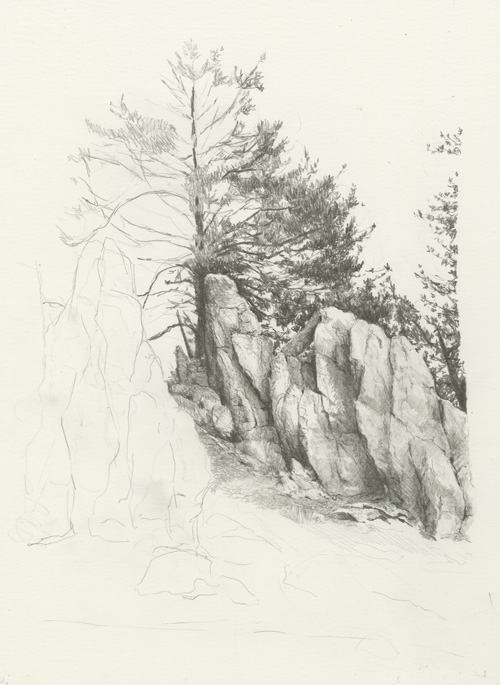
I've finished the tree (although I think I need to do some more shading for depth on top.). I starting to work on the small path between the rocks. I've blocked in the rest of the rocks on the left as well.


I'm progressing on the pine tree in the background. It is more of a silhouette than much detail. I should have toned the sky before I started. This would have allowed the highlights in the rocks stand out more. I'll call this one a nature study as I really am just experimenting with textures and shadowing.


This is the first WIP. I am still experimenting with trying to capture the rocks. Between the fluid cracks and the subtle shadows and textures, they are a real challenge to do.

This fall we had a wonderful opportunity to visit our son in Tehachapi, CA. He recently moved out there to work at Scaled Composites in Mohave. We spent one day in a delightful trip to the Sequoia National Park. Taking a narrow, mountain road we reached the top at 8,000 feet elevation. This was one of the peaks. I was thrilled to get a number of great photos of rocks and trees.


Sunday, October 07, 2007

Jawbone Series

Two hours after finishing & posting the deer....here is Mr Bob. This tortoise is 109 years old and lives at the ranger's station. I worked as quickly as possible, attempting to capture the textures and strong shadows.

I've just completed the third one in the series: a mule deer. Just look at the size of those ears!


Here's the second in the series: A little kangaroo rat.


While visiting our son, Matt, a few weeks ago, we stopped at the Tehachapi ranger station. Robin, the gal from the station, requested that I create some Death Valley critter notecards. It sounds fun to do and a chance to draw some unusual little creatures.

This is the first of a series that I will be creating. This is an antelope ground squirrel:

Saturday, September 29, 2007

Morning Coffee

Now onto the towel. The folds in the towels and the edging add interest to the bottom of the drawing. The highlights pull out the folds nicely.

Now onto the wallpaper. I have no intention of drawing the intriquit design of the wallpaper, however, just an impression of the design has been rendered. I have shaded the top corners to draw the attention right back to the coffepot and grinder.

I might make some minor changes yet, but I think I just might be done!


I have added the burlap sack and coffee beans. The intent of my drawings is not to include every detail of an object, but just to give an impression of it. This holds especially true to the sack and beans. I have only given the hint of threads in the sack and the beans are more texture and shade than individual beans.


I have been able to get a little bit done this week on the coffee pot. I am using Arches Watercolor Hot press paper which has a much softer feel than the usual paper I use (Strathmore Bristol Smooth). It also scans with a very creamy color. I have not changed the image to a grayscale. But will shortly.

Still lifes really provide an excellent opportunity to explore different textures and the how light plays on different types of surfaces.


I've been contemplating a still life using a coffee grinder for quite some time. Finally have found the right ingredients. I just picked up the coffee pot today, borrowed the coffee grinder from my best friend, Char, and made the burlap sack and filled it with Starbucks expresso beans. Found some material that looks like old fashioned wallpaper of the 1890's. I think I'm ready to start. Now I just need to decide what kind of lighting to use......